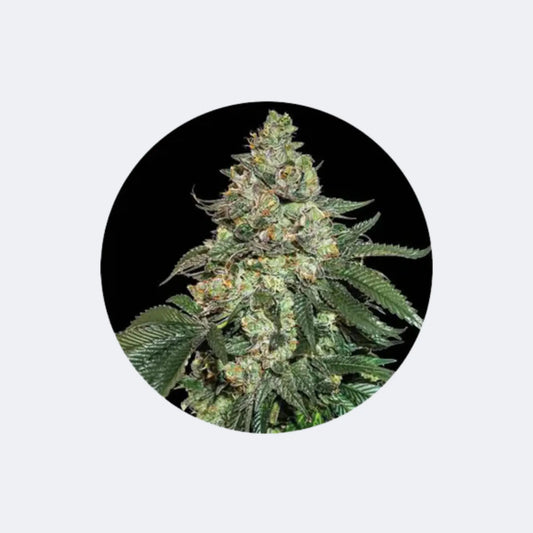
Obtaining cuttings from cannabis mother plants
Andreas LeschkeShare blog post
Become the "Kaminoan" of your own cannabis clone army
In today's blog post, which is about the sustainable propagation of your favorite strain, I deliberately avoided using the word "cutting" in the title, as it wouldn't do justice to this unique method of propagation, where you can preserve and clone your favorite weed lady for infinity.
Furthermore, it's a fact that taking cuttings isn't the only, nor even the most effective, way to obtain clones of your favorite plant. But that will become clear throughout this article, so everyone will be able to obtain cuttings that are guaranteed to "work" and root.
For any guaranteed success, you must of course take into account the exact implementation and timing, as well as other factors, in order to obtain truly healthy cuttings in order to permanently and sustainably preserve your beloved grindgrass palm.
Therefore, we start with the basics, which basic requirements the plant should meet in order to be able to obtain healthy cuttings from it.
Basic requirements of the plant for successful cutting production
First of all, we should consider that the production of cuttings only makes sense if the mother plant is healthy, strong and has a certain maturity.
Just as with high-stress training methods, the mother plant will be stressed by removing shoots, as we will be causing significant damage with the cuts, from which it will then have to recover.
Furthermore, we want to achieve healthy plants, so the risk of producing diseased cuttings is much higher with a diseased mother plant than with a healthy and robust mother plant.
The mother plant should be at least 6 to 8 weeks old, so that it has already reached a certain size and maturity to produce side shoots that are at least 10-12 cm long. By now, everyone will realize that producing cannabis cuttings only makes sense with photoperiod genetics and not automatics.
This is due to the fact that automatic weed genetics usually start flowering after 4-5 weeks at the latest, so the vegetative phase is simply not long enough to produce cuttings that would have enough time to grow properly.
With cannabis, experience has taught us that the mother plant is capable of producing healthy and productive clones until the sixth month. After this period, the mother plant loses too much energy and the vitality necessary to continue providing us with clones.
Another factor to consider is timing. To take cuttings from the mother plant, it's recommended to separate the clones from the mother plant toward the end of the light period or in the early morning, just before the light period.
At this point, just before the light goes on or off, the plant has stored the most nutrients and the highest water content, which is vital for effective rooting of the clones.
Equipment for the production of cuttings
At first, many people think that apart from scissors, some soil and a small flowerpot, you hardly need anything to clone the plant.
Unfortunately, this alone isn't enough. To successfully produce cuttings, we need sharp scissors and a sharp blade, a container of water, rooting gel (e.g., Clonex Gel, Root!i Gel, etc.) or rooting powder (from Neudorff or other manufacturers), a cutting mat (preferably made of glass or plastic), a miniature greenhouse, a substrate for the cutting to root (coconut pellets, rock wool, or soil), disinfectant, and a clean microfiber cloth.
Preparation and implementation of cannabis cloning
When producing cuttings, working cleanly and quickly is essential. Therefore, everything needed for cloning our beloved wonder plant should be prepared and ready for use.
First, we select the healthiest plant with the most vigorous shoots we want to harvest and note them down. As mentioned above, the shoots should be at least 10 cm, preferably 12 cm, long. They should also be robust but still flexible so they can quickly form roots.

We then prepare everything that will be used.
We place a container of water (pH value should be 5.8 to 6) next to the plant, disinfect the scissors, blade, and cutting board, and wipe them dry with a clean cloth.
We then fill a small container with some rooting gel or powder and place it near the substrate where the cutting is to take root.
We also prepare the substrate for the growing pots by wetting it and letting it drain until it is moist but no longer wet.
Now it’s time to put it into practice.
We cut the cutting about 1 cm below a node (node point) and immediately place it, cut side down, in the prepared container of water after separating it from the mother plant. Please waste no time with this process, otherwise there is a risk that the cutting will draw in air, which could prevent healthy rooting.
Once we've separated the cutting(s) from the mother plant, we take them to the cutting board in water. Here, the cuttings, after being separated from the mother plant, are tuned for rooting!
To do this, the cutting is removed from the water and placed on a disinfected cutting surface using a disinfected blade (scalpel) to trim it to a length of 10-12 cm with a 45° cut. The angled cut creates a larger wound surface, allowing the cutting to form more roots more quickly.
The cutting is then briefly immersed in the rooting gel or powder to ensure more successful root formation through the additional hormones of the root stimulator and then the cutting is placed in its moist substrate in which it is to root.
Next, we use disinfected scissors to remove all leaves and any shoots from the cutting, leaving only the top leaves. Any leaves and shoots below the topmost node are removed to optimize energy for the growth of the cutting as the main shoot.
As a final step, we place the cutting and its substrate into the miniature greenhouse and seal it. Cuttings require high humidity of 70 to 90% and a temperature of 22 to 26°C, making the use of a miniature greenhouse essential to achieve these values.
For this reason, the substrate in which the cuttings are to grow should always be kept moist, but not too wet to prevent mold growth. It is recommended to use a spray bottle to maintain constant moisture in the substrate.
Finally, I would like to add that taking cuttings is not the only or even the most effective method for obtaining healthy cuttings.
If you cut off so much of a plant, for example through later topping, that the severed stem or branch of the plant provides further stable side shoots of the corresponding length, it is recommended not to cut these shoots but to break them off from the plant.
This may sound brutal at first, but in my experience it is the most potent method for obtaining cuttings that root quickly.
By breaking off the shoots, we can skip the step of trimming the clone with a disinfected scalpel on a cutting board, making a 45° cut, and can dip them directly into the rooting gel or powder and plant them in the moist substrate.
After this, of course, remove the leaves and shoots below the highest node and then place them in the miniature greenhouse.
By breaking off the cutting, we create a very large wound, which is ideal for effective and rapid root formation. Please note, however, that the shoots should be strong enough to break off easily without fraying the tissue. They should still be flexible enough to grow healthy as a young cutting.
Cuttings should also not be taken from the living plant, as there is a risk that the wound on the plant will become too large, which could cause unnecessary damage.
Therefore, this method should only be implemented on a severed shoot with side shoots, where we do not have to worry about the vitality of the living plant.
By producing cuttings, it is possible to preserve your favorite plant permanently by allowing cuttings to become mothers again, which provide further cuttings for subsequent clone generations.
All these clones will deliver 100% the same results in terms of quality, potency, and yield because they are genetically identical and one.
We thank the author Jorge Rieger for this blog post on the topic of "Taking Cuttings from Cannabis Mother Plants." Feel free to follow him on his Facebook account. --> Click here

